
How to Create a Black & White to Color Hover Effect in Showit: Code & No-Code Methods
Looking to add some interactive flare to your Showit website? The black and white to color hover on image effect is a fun way to make your images more engaging. In this tutorial, I’ll show you two different methods to achieve this effect – one using custom CSS code and another using Showit’s built-in features with no coding required.
Method 1: Using Custom CSS (The Code Method)
This method uses CSS filters to create the effect and requires only one image. Here’s how to do it:
Step 1: Prepare Your Image
- Upload your colored image to your Showit Canvas
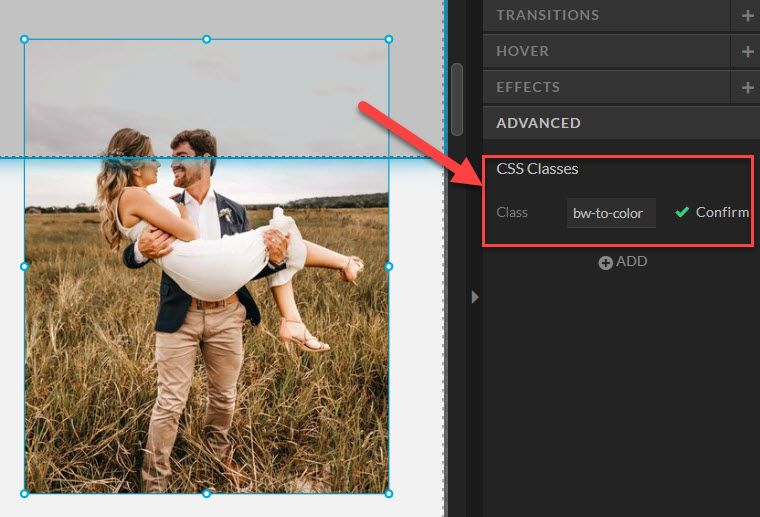
- Select the Image on your canvas
- In the right sidebar, click on “Advanced:
- Add a custom class name, such as “bw-to-color”
Step 2: Add the Custom CSS
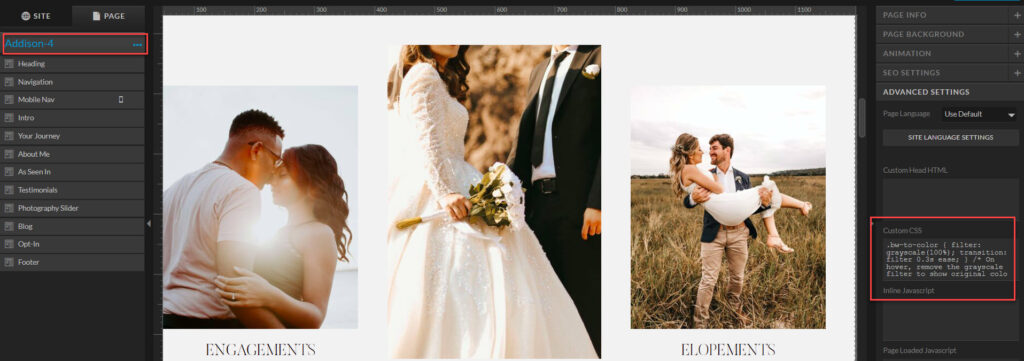
- Under Page settings in the upper-left hand side, select the Page Name
- On the right hand side of the builder under “Advanced Settings” select “Custom CSS”
- Copy and paste the code below, and then press save
.bw-to-color {
filter: grayscale(100%);
transition: filter 0.3s ease;
}
.bw-to-color:hover {
filter: grayscale(0%);
}
Step 3: Test Your Effect
- Enter Preview mode
- Hover over your image to see the transition from black & white to color
- Adjust the transition timing if needed to your preferred speed. This is where you currently see “0.3”
Method 2: The No-Code Method
This method uses two separate images and Showit’s built-in hover settings. While it requires two versions of your image, it gives you more control over the exact look of both states.
Prepare Your Images
- Create two versions of your image:
- A colored version
- A black & white version (easily created with tools like Canva)
- Upload both images to your Showit site
Step 2: Layer Your Images
- Place the colored version of your image on your canvas first
- Add the black & white version directly on top of it
- Make sure both images are exactly the same size
- Use the alignment tools to ensure they’re perfectly alighned
Step 3: Configure Hover Settings
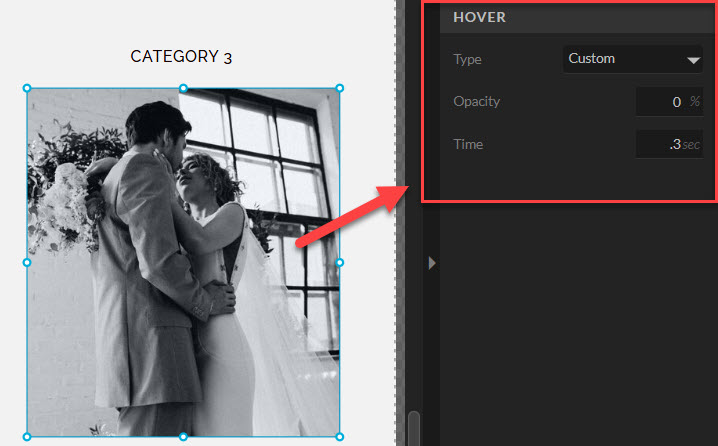
- Select the black and white image (the top photo)
- In the right sidebar, find the “Hover” settings
- Under “Type” select “Custom”
- Under “Hover Opacity”, set it to 0%
- Set the transition time to your preference (around .3 seconds works great)
Step 4: Test and Adjust
- Enter Preview Mode
- Hover over your image to test the effect
- Adjust the transition timing if needed
- Make sure your images are perfectly aligned
Pro Tips for Both Methods
- Keep your image file sizes optimized for web for smooth loading
- Consider the transition timing – too fast can feel jarring, too slow can feel sluggish
- Test on both desktop and mobile
- Make sure the black and white version of your image has good contrast
Which Method Will Choose?
Both methods can create a fun hover effect that adds interactivity to your website. The CSS method words well because it only requires one image, but the no-code works well if you’re not comfortable using CSS. Choose the method that best fits your comfort level with code and your specific needs. Remember, the goal is to enhance your visitors’ experience while keeping your site running smoothly.
Ready to take your Website to the next level?
These hover effects are just the beginning of what’s possible with our premium Showit templates. Our templates are fully customizable, so you can easily incorporate these hover effects and many other engaging features. Visit our template shop today and transform your online presence with a website that not only looks professional but also delivers an unforgettable user experience.
